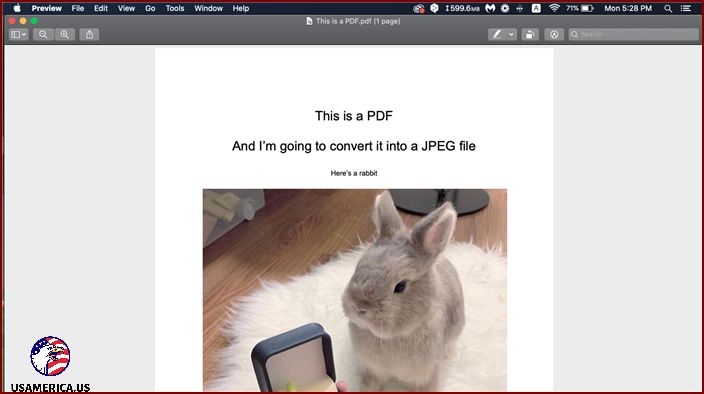
Hey there! If you’ve ever wanted to convert a PDF file to an image format on your Mac, I’ve got some great news for you. You don’t need any fancy tools or complicated commands. All you have to do is open your PDF file with Preview, and you can easily export it as a JPEG, JPEG 2000, or PNG image – whichever you prefer!
Contents
The Easiest Way to Convert Images to Other Formats on Mac
Guess what? Converting images from one format to another on your Mac is actually really simple. You don’t need to download any special software or search for complicated instructions. It’s all built right into your Mac! Pretty cool, huh? Let me tell you more about it.
But why would you want to convert a PDF to a JPEG?
It might sound strange, but it’s actually pretty handy. You’ve probably found yourself in a situation where you needed to have your itinerary or plane ticket easily accessible before boarding. Instead of opening up the PDF file, most people just take a screenshot, right? The only problem is, screenshots can sometimes have low resolution.
But don’t worry, there’s a solution. You can convert your screenshot to a JPEG or PNG file. It’s much better this way because you can save it in your phone’s gallery instead of having to navigate through your file explorer.
Not only that, but JPEG files are also lighter in terms of file size compared to PDFs. So if you’re trying to save space, converting your documents to JPEG or PNG might be the way to go.
Converting HEIC to JPG on macOS
Apple has introduced a new image format called High-Efficiency Image Format (HEIC) as a replacement for JPEG. Read more
Converting PDF to JPEG / PNG on Mac: A Step-by-Step Guide
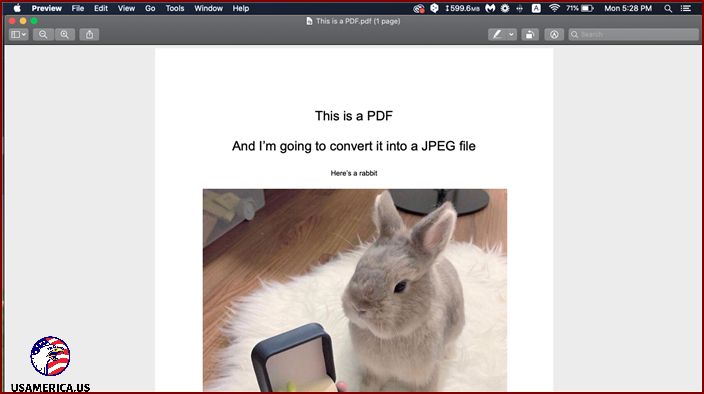
- To begin, let’s open the PDF file using Preview. If it happens to open in your browser, like Chrome or Firefox, simply right-click on it and select “Open with Preview”. If needed, you can also refer to the accompanying image for visual guidance.
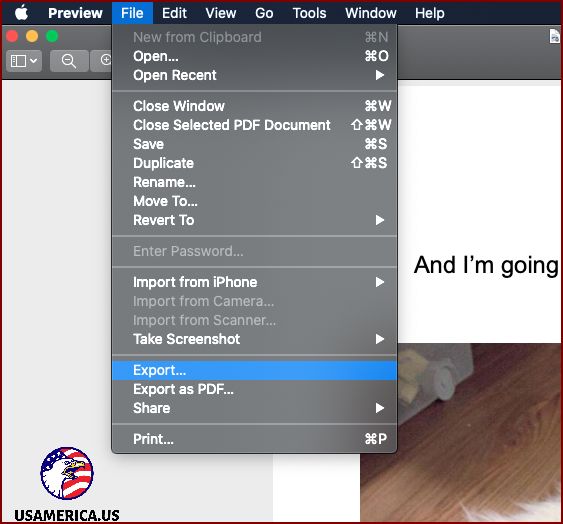
- Once the file is open in Preview, navigate to the File tab and click on Export. Again, feel free to check out the image below for reference.
- A window will appear, giving you the option to select a file format. From the dropdown menu, choose the format that best suits your needs. In my case, I selected JPEG. Don’t worry – take a look at the included image if you need help.
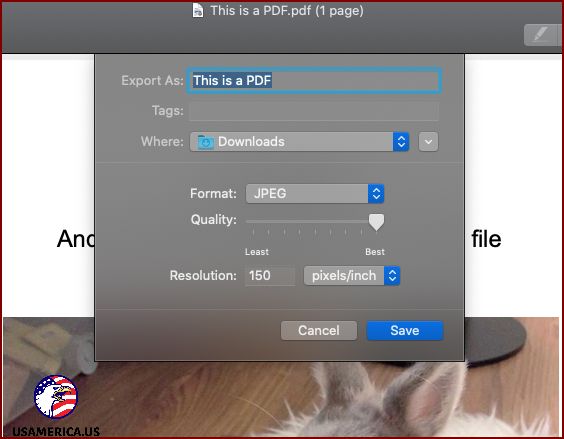
First, I’ll ask you how you want to export the file. You can choose the export quality, which affects the file size and pixelation. For saving space, you can set it as low as 10%, but keep in mind that it will be pixelated. I recommend a minimum of 60% to maintain decent image quality.
After selecting the export quality, click on the “Save” button to save the changes.
You can check the file’s information to confirm that it has been exported as a JPEG file.
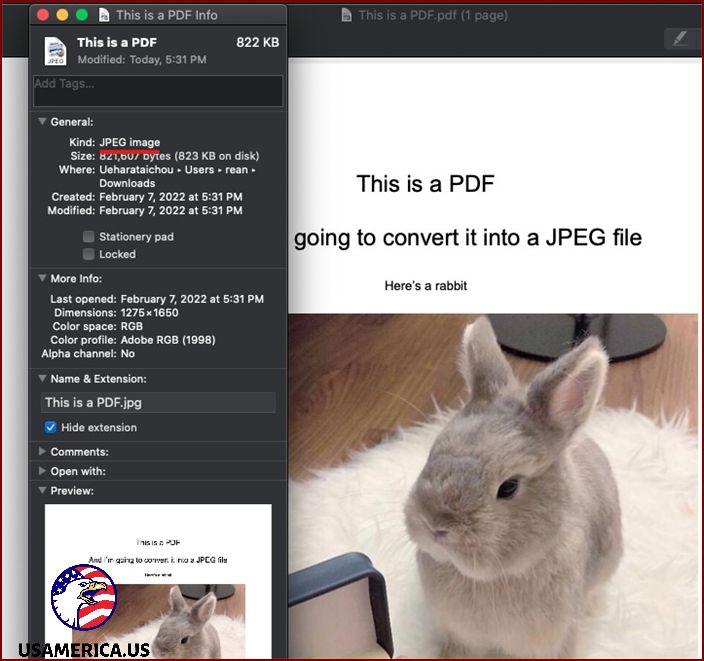
Caution: Please note that this method is suitable only for single-page files. If you have multiple files, you can still convert them one by one, or take advantage of the convenient Automator tool.
How to Convert a PDF to an Image File on Mac
- First, press Command + Spacebar to open the helpful Spotlight.
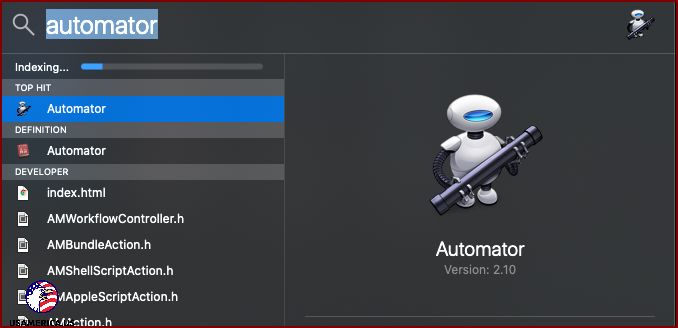
- Next, search for the Automator app and click on it.
- Once the app loads, you’ll be greeted by this screen. Select Quick Action.
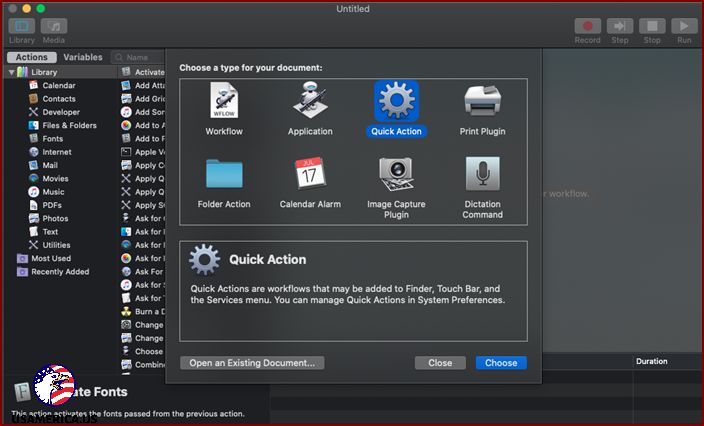
Converting your PDF files to image files has never been easier! Follow these simple steps and enjoy the convenience.
First, open a new window and look for the option labeled “Workflow receives current.” It will be accompanied by a drop-down menu. From the menu, select “PDF files.” You can refer to the image below for visual guidance.
Next, you’ll notice a search bar located on the left-hand side. You have two options: you can either use the search bar to look for “Render PDF Pages as Images,” or you can simply scroll down until you come across it. Once you’ve found it, go ahead and double-click on it or drag it to the right panel.
Feel free to refer to the image below for further assistance.
I’m going to show you how to convert a PDF file to an image file on your Mac. It’s actually quite simple! Let’s get started.
First, open the PDF file that you want to convert. To do this, just double-click on the file. It will open in the Preview app.
Once the PDF file is open, click on the “File” menu option at the top of the screen. A drop-down menu will appear.
In the drop-down menu, click on the “Export” option. A new window will pop up.
In this new window, you will see options for the format, color model, resolution, and compression. Don’t worry too much about these options – you can just leave them with the default settings. Or, if you want the best quality, you can increase the compression a little bit.
After you’ve chosen your options, click on the “Save” button. The PDF file will now be converted to an image file and saved to your computer.
Now, let’s move the converted files to a specific location on your computer. This will make them easier to find later.
Go back to the “File” menu at the top of the screen and this time, click on “Automator”. A new window will open.
In this new window, you’ll see a search bar at the top. Type in “Move Finder Items” and press Enter.
From the search results, drag the “Move Finder Items” action and drop it into the main panel on the right side of the window.
Now, choose the location where you want the converted files to be saved. You can choose any folder on your computer. For example, you can save them on your Desktop.
Finally, click on the “File” menu again and this time, click on “Save”. Give your workflow a name, like “Convert PDF to JPG”, and save it to a location on your computer where you can easily access it later.
That’s it! You’re all set to convert PDF files to image files on your Mac. It’s a simple process that can come in handy in many situations. Give it a try!
How to Automate Tasks in Mac with Folder Actions
Folder Actions are an incredible tool that you can use on your Mac. They provide a convenient way to automate various tasks. So, let’s dive in and explore how you can harness this power to make your life easier!
Now, let’s put our newfound knowledge to the test and see if it works!
The first step is to locate the PDF file you want to convert. Luckily, you don’t need to open it for the conversion process. In this example, I’ll use a sample PDF with two pages. Once we set up the automation, it should generate two separate JPEG files for us.
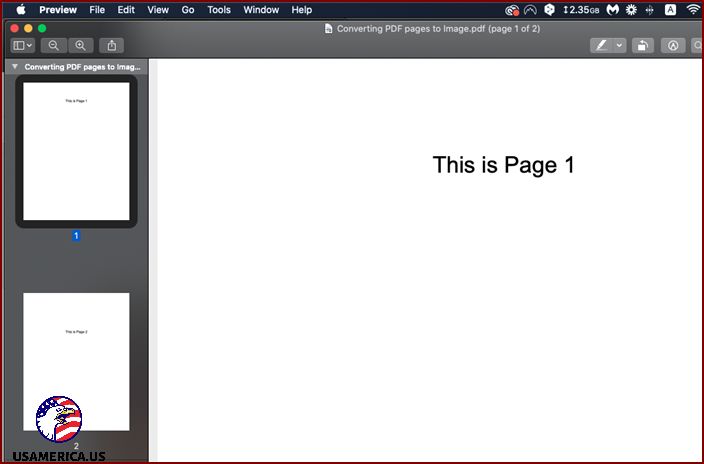
Alright, so imagine you’ve got your PDF file. Now, it’s time to take action. Just right-click that file, and like magic, two options will pop up! Exciting, right?
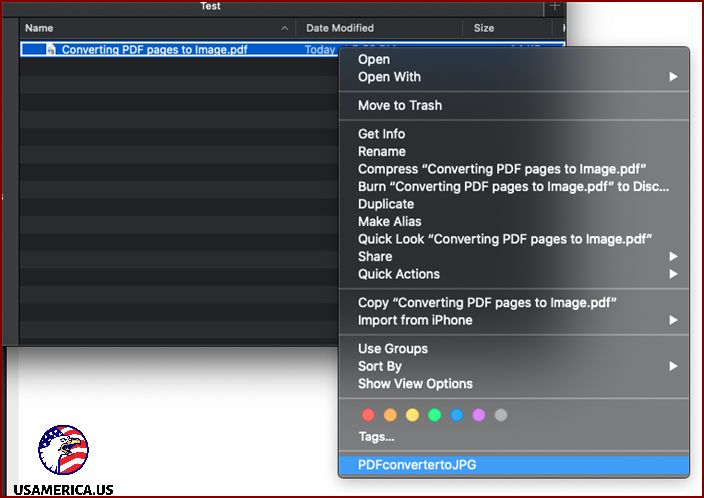
If you’re using the latest version of Monterey or Big Sur, you’ll notice a new feature called “Quick Actions” at the bottom of the screen. Just hover over it and click on “Automation.” This will instantly convert your PDF into separate JPEG files.
However, if you’re using an older version of macOS, you won’t see “Quick Actions.” Instead, you’ll see the name of your specific quick action right away.
Once you find and click on the action (in my case, I named it “PDFconvertertoJPG”), it will create the two files instantly. No questions or prompts. To prove it, here’s my desktop with the two pages as separate PDF files.
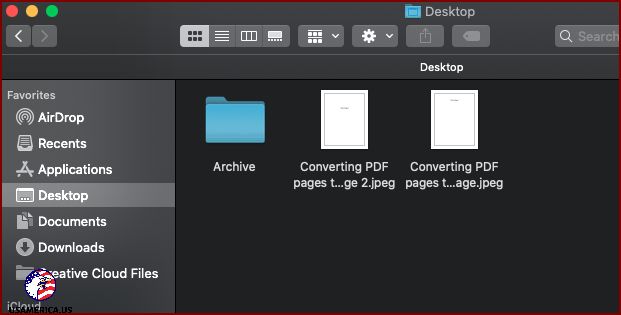
There you have it! You managed to transform your PDF into a picture file on your Mac, all thanks to the Automator app! Plus, feel free to choose whichever file format suits you best. I hope this information was useful to you!
Post navigation
Hello! I'm Ronald Smith, a dedicated finance consultant based in the USA and the author behind usamerica.us. My passion lies in empowering individuals and businesses to navigate the complex world of finance with confidence and ease. With a wealth of experience in financial planning, investment strategies, and economic insights, I've established usamerica.us as a premier destination for those seeking to enhance their financial literacy and achieve their economic goals. Whether you're aiming for personal wealth management, understanding market trends, or seeking strategic investment advice, my mission is to provide you with the tools, knowledge, and support needed to make informed financial decisions. Welcome to my world, where your financial success is my top priority!
