38 iPhone Hacks You Need to Know
The iPhone is an amazing device that can do so much and replace many everyday tools. But even if you’re a big iPhone fan, you might not know about all of its hidden features and cool tricks. That’s why I’m here to share some of the lesser-known, yet equally interesting, things your iPhone can do. These tips and tricks can be really useful in your daily life and help you get the most out of your iPhone. So, let’s dive into the list and discover some amazing iPhone hacks!
- Create your own custom alerts for different people
- Try out the amazing features of the new iOS before anyone else by installing the Beta version
- Use your iPhone as a magnifying glass for those times when you need to see things up close
- Teach Siri to call you by a nickname or a special name that you like
- Don’t put up with Siri mispronouncing names – correct her and make sure she gets it right
- Connect two pairs of AirPods to your iPhone at the same time and share your music or podcast with a friend
There are many useful features and tips that can help you get the most out of your iPhone. In this article, I’ll share some of my favorite ones with you, in simple and easy-to-understand language. Let’s dive in!
1. Unsubscribe to services no longer needed:
If you find yourself receiving unwanted subscription emails, it’s time to say goodbye. Just go to your email settings and unsubscribe from the services you no longer need. It’s a quick and easy way to declutter your inbox.
2. Migrating from Android to iOS:
Are you switching from an Android device to an iPhone? Don’t worry, Apple has made the transition process smooth for you. Just follow the simple steps in the settings menu to transfer your data, contacts, and apps to your new iPhone. It’s hassle-free!
3. How to force reboot your iPhone:
Sometimes, your iPhone might freeze or become unresponsive. In such cases, a force reboot can do the trick. Just press and hold the power button and the volume down button at the same time until you see the Apple logo. Your iPhone will restart, and hopefully, the issue will be resolved.
4. Update all apps in one click:
Keeping your apps up-to-date is important for security and performance. To save time, you can update all your apps at once. Just go to the App Store, tap on your profile picture, and scroll down to “Update All.” It’s that simple!
5. Ask Siri for password:
Forgot your password? No worries! Just ask Siri to help you out. Say something like, “Hey Siri, what’s my password for [app/service]?” Siri will provide you with the information you need, without any hassle.
6. Use your iPhone as a Continuity Camera for Mac:
Did you know that you can use your iPhone as a camera for your Mac? With Continuity Camera, you can take a photo or scan a document on your iPhone, and it will instantly appear on your Mac. It’s a seamless way to transfer files and images between your devices.
7. Create custom ringtones for iPhone:
Tired of the same old ringtones? You can easily create custom ringtones for your iPhone. Just choose a song from your music library, edit it to your liking, and set it as your ringtone. It’s a fun way to personalize your iPhone.
8. Shortcut all the way to the top of Photo Album:
Do you have hundreds of photos in your album and want to quickly jump to the top? Here’s a shortcut for you. Just tap on the status bar at the top of your screen, and you’ll be instantly taken to the beginning of your photo collection. It’s a small trick that can save you lots of scrolling time.
9. Find missing AirPods with Siri:
Misplaced your AirPods? Don’t worry, Siri can help you find them. Just ask Siri to locate your AirPods, and it will play a sound to help you track them down. It’s a handy feature for those moments when your AirPods go missing.
10. Send Unknown Callers to Voicemail:
Tired of unwanted spam calls? You can set your iPhone to automatically send unknown callers to voicemail. Just go to your settings, select “Phone,” and toggle on the “Silence Unknown Callers” option. It’s a great way to avoid distractions and spam.
11. Optimize charging to increase battery life:
To keep your iPhone battery healthy, you can enable optimized charging. This feature learns your daily charging patterns and reduces battery aging. It helps your battery stay at a lower state of charge for longer periods, which can extend its overall lifespan.
12. Move multiple apps at once:
Rearranging your home screen? You don’t have to move your apps one by one anymore. Just long-press on an app until it starts shaking, then drag it to your desired location. While still holding the app, use another finger to tap on other apps you want to move. It’s a time-saving trick!
13. Using iPhone as Apple TV Remote:
Instead of searching for your Apple TV remote, you can use your iPhone as a remote control. Just download the Apple TV Remote app, connect it to your Apple TV, and you’re good to go. It’s a convenient way to navigate and control your Apple TV.
14. Remove the last digit in the Calculator app swiftly:
Made a mistake while using the Calculator app? Instead of starting over, you can quickly remove the last digit by swiping left or right on the calculator screen. It’s a small but handy trick that can save you time.
15. Scan QR Code with the Camera app:
Need to scan a QR code? You don’t need a separate app anymore. Just open your Camera app, point it at the QR code, and you’ll receive a notification with relevant information. It’s a simple way to access websites, coupons, and more.
16. Set a sleep timer for playing media:
If you enjoy listening to music or podcasts before bed, you can set a sleep timer to automatically stop playback after a certain duration. Just go to your Clock app, select “Timer,” and choose “Stop Playing” under the “When Timer Ends” section. It’s a useful feature for a peaceful night’s sleep.
17. Hide photos in the Photo Album:
Want to keep your private photos private? You can hide them in your Photo Album. Just select the photos you want to hide, tap on the share button, and choose “Hide.” The photos will be moved to a hidden album, ensuring your privacy.
18. Use iPhone as a level:
Need to hang a picture or straighten a shelf? Your iPhone can help you with that. Just open the Compass app and swipe left to access the level. It uses the built-in accelerometer to show you if a surface is level or not. It’s a handy tool for small home projects.
19. Use iPhone’s keyboard as a trackpad:
Editing text can be frustrating on a touchscreen. But with this neat trick, you can turn your iPhone’s keyboard into a trackpad. Just long-press on the space bar until the keys disappear, then move your finger around to control the cursor. It’s a precise way to edit text with ease.
I’m going to show you some cool tricks you can do on your iPhone. You can try these out to make your iPhone experience even better! Let’s get started:
1. Remove App download size limit:
Sometimes, you want to download an app, but it’s too big. You can remove the limit on app download size so you can download any app you want without worrying about the size.
2. Silence all unknown callers:
Are you tired of getting calls from unknown numbers? You can silence all unknown callers, so you won’t be bothered by those annoying calls anymore.
3. Close all Safari tabs at once:
Do you have too many tabs open in Safari? You can quickly close all the tabs at once, making it easier to start fresh and stay organized.
4. Use Spotlight for quick math:
Need a quick math calculation? You can use Spotlight to do the math for you. It’s a handy feature that saves you time and brainpower.
5. Stop apps from asking for feedback:
Some apps constantly ask for feedback. It can get annoying. You have the power to stop that from happening. Say goodbye to those pesky feedback prompts!
6. Start a group Facetime Call:
Want to have a video call with multiple friends or family members? You can start a group Facetime call and have everyone join in on the fun.
7. Make your iPhone flash when getting notifications:
If you want to make sure you don’t miss any notifications, you can set your iPhone to flash when you receive a notification. It’s a nifty feature that grabs your attention.
8. Add multiple faces to Face ID:
Did you know you can add more than one face to your Face ID? This is great if you want to share your phone with a family member or trusted friend.
9. Use a one-handed keyboard:
If you find it challenging to type with one hand, you can enable a one-handed keyboard. It makes typing on your iPhone easier and more convenient.
10. Scan documents using Notes and File apps:
You don’t need a separate scanning app. You can scan documents right from the Notes and Files apps. It’s a simple and efficient way to go paperless.
11. Offload unused apps:
If you’re running out of storage space on your iPhone, you can offload unused apps. This will free up space while keeping your data intact.
12. Create a custom vibration:
Want to assign a unique vibration pattern to a specific contact? You can create custom vibrations for different people in your contacts, so you’ll know who’s calling or texting without even looking at your phone.
13. Get texts/calls on other Apple devices:
If you have other Apple devices, like an iPad or Mac, you can set them up to receive texts and calls from your iPhone. It’s a convenient way to stay connected across all your devices.
So there you have it – some awesome iPhone tricks to enhance your experience. Give them a try and make the most out of your iPhone!
Hey there! Want to give a special ringtone to one of your contacts? Here’s how you can do it:
- Tap on the contact you want to customize.
- Select “Edit” and then choose either “Ringtone” or “Text Tone”.
- You can pick a ringtone or text tone from the list of options provided by Apple. It will play whenever that person calls or texts you.
Just a heads up: Unfortunately, you can’t use any music service for this feature.
Contents
- 1 Get the New iOS Beta Version
- 2 Installing the iOS 11 Public Beta on Your iPhone or iPad
- 3 Turn Your iPhone into a Magnifying Glass
- 4 Let’s Teach Siri to Call You by a Special Name!
- 5 Fixing Siri’s Name Pronunciation
- 6 How to Connect Two Pairs of AirPods to Your iPhone
- 7 Cancelling unnecessary subscriptions
- 8 Moving from Android to iOS
- 9 How to Force Start or Reboot Any iPhone
- 10 How to Update All Apps with Just One Click
- 11 Asking Siri for Passwords
- 12 Transform Your iPhone into a Handy Mac Camera
- 13 Create your own custom ringtones for iPhone
- 14 A Handy Shortcut to the Beginning of Your Photo Album
- 15 Find Your Missing AirPods with Siri
- 16 Send Unknown Callers Straight to Voicemail
- 17 Improve Battery Life with Charging Optimization
- 18 Move several apps together
- 19 Using Your iPhone as an Apple TV Remote
- 20 Quickly erase the last number in the Calculator app
- 21 Use Your iPhone Camera to Scan QR Codes
- 22 How to set a sleep timer for media on your iPhone
- 23 Keep Your Photos Private in the Photo Album
- 24 Utilize Your iPhone as a Handy Leveling Tool
- 25 Turn Your iPhone Keyboard into a Trackpad
- 26 Silencing Unknown Callers
- 27 Close all of your Safari tabs at once
- 28 Use Spotlight for quick math
- 29 Put an end to apps hounding you for feedback
- 30 Want to start a group FaceTime call?
- 31 How to Unlock iPhone Without Passcode
- 32 Using the One-Handed Keyboard
- 33 Scan documents using the Notes and File apps
- 34 Transferring Data From Your Old iPhone to iPhone 13
- 35 Create Your Own Special Vibration Pattern
Get the New iOS Beta Version
If you’re an iOS developer or just someone who’s curious about the upcoming iOS version, you can try out the Beta version before it’s released! Here’s how:
Follow this step-by-step guide to install the Beta version of iOS on your iPhone.

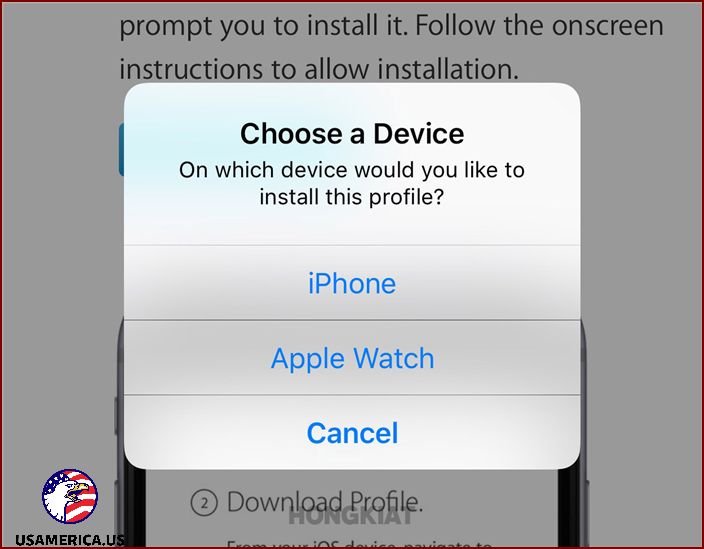
Installing the iOS 11 Public Beta on Your iPhone or iPad
Hey there! Want to be ahead of the pack and get all the cool new features of iOS 11 before everyone else? You’re in luck! I’ll walk you through the simple process of installing the iOS 11 Public Beta on your iPhone or iPad.
Turn Your iPhone into a Magnifying Glass
Did you know that your trusty iPhone can transform into a magnifying glass? It’s amazing how versatile this little device is! This feature can be a real game-changer for folks with less-than-perfect eyesight. Plus, it could be super helpful during a scavenger hunt to uncover hidden clues!
Ready to give it a try? Here’s what you need to do:
- Open the Settings app on your iPhone or iPad.
- Scroll down and tap on “Accessibility”.
- In the “Vision” section, tap on “Magnifier”.
- Switch the toggle button to the “On” position.
Voila! You’ve now successfully transformed your iPhone’s camera into a handy magnifying glass. To activate it, simply triple-click the home button, and your screen will transform into a helpful viewfinder.

Let’s Teach Siri to Call You by a Special Name!
Siri is an amazing piece of technology and a fantastic feature for iPhone users. But, did you know that Siri can also bring a smile to your face? It’s true! She can do more than just perform tasks – she can make you feel good too! How cool is that?
So, here’s a little trick to have even more fun with Siri: teach her to call you by a special name. It’s super easy! Just follow these simple steps:
- Activate Siri by holding down the side button on your iPhone.
- Once Siri is listening, say, “Call me ___ from now on.”
- Fill in the blank with the name you want Siri to call you. It can be anything you like – get creative with it!
- And that’s it! Siri will remember your new name and call you by it whenever you interact with her.
How cool is that? Now you can add a personal touch to your conversations with Siri and have some fun at the same time. Enjoy!

Fixing Siri’s Name Pronunciation
Ever had trouble getting Siri to say a name correctly? It can be frustrating, but don’t worry—I’ve got some tips to help you out. The cool thing is that you can actually teach Siri the right way to say a name, and you only have to do it once!
If Siri says a name wrong, just say:
“That’s not how you say ____.”
Siri will respond:
“OK, how do you pronounce the name ____?”
Then, Siri will suggest some different pronunciations for you to listen to. Just tap the play button to hear them out loud.
If none of Siri’s options are correct, don’t worry. Simply say the name again, and Siri will offer more options.
Once you find a pronunciation that you’re happy with, just tap “Select,” and Siri will say:
“OK, ____ it is.”

How to Connect Two Pairs of AirPods to Your iPhone
Did you know that you can connect two pairs of AirPods (or certain Beats headphones like the Powerbeats Pro and Beats Solo Pro) to your iPhone? Yep, it’s true!
This is an awesome feature, especially when you’re traveling with a buddy and you both want to watch the same movie or listen to the same tunes.
- To get started, open the charging case for one pair of AirPods and press and hold the pairing button on the back until the light starts flashing white. This puts the AirPods in pairing mode.
- Next, bring the AirPods close to the iPhone you want to connect them to.
- A pop-up menu will appear on your iPhone screen, asking if you want to pair the AirPods. Just tap “Pair” to confirm.
- Now, it’s time to connect the second pair of AirPods. Repeat the same steps outlined above.
- But wait, there’s a catch! When you start playing music, it will only come out of one pair of AirPods. Bummer, right?
- To connect two pairs of AirPods to your iPhone and hear music simultaneously, follow these steps:
- Connect the first pair of AirPods to your iPhone through the usual pairing process.
- Next, open the Control Center on your iPhone by swiping down from the top-right corner of the screen (or up from the bottom on older iPhone models).
- Tap and hold the audio card in the top-right corner of the Control Center.
- In the expanded audio panel, you should see the AirPlay icon along with the name of the first pair of AirPods that you connected.
- Tap the AirPlay icon, and a list of available audio output options will appear.
- Now, select the second pair of AirPods from the list.
You’re all set! You’ll now be able to enjoy the music simultaneously through both pairs of AirPods.
Cancelling unnecessary subscriptions
Every now and then, we subscribe to a service that we end up not using or no longer need. Unfortunately, we often forget to unsubscribe, and as a result, we continue to be charged without realizing it. Sometimes, we only realize this after the payment has already been made.
If you want to check which services you’re currently subscribed to or make changes to them:

- First, head over to the App store.
- Next, click on the avatar on the top right to access your account.
- Once you’re in your account, find and click on the subscriptions tab. This will show you a list of all the services you’re currently subscribed to, along with the renewal information. If you want to cancel any of these subscriptions, simply select the app and tap “Cancel Subscription”.
Remember: Canceling a subscription won’t end it immediately; it will continue until its scheduled renewal date.
Moving from Android to iOS
So, you’ve made the decision to switch from an Android phone to an iPhone. Congratulations! But hold on a second – I bet you’re facing some challenges when it comes to transitioning between operating systems. After all, Android and iOS are quite different when it comes to features and functions.
Don’t worry, I’ve got you covered! In this post, I’ll explain everything you need to know about switching from Android to iOS. By the end, you’ll be ready to dive into the world of your new iPhone.
Title: Migrating From Android to iOS: 10 Important Questions
Are you an Android user who just got an iPhone and is struggling with the setup? Well, you’re in luck! I’ll answer all your burning questions about transitioning to iOS. Let’s get started!
Title: How to Restart Your iPhone
Apple’s iOS is pretty great, but sometimes things go wrong. Maybe one of your apps freezes or your whole phone gets stuck. Not to worry! I’ll show you how to force reboot your iPhone. No matter which iPhone model you have, this tutorial will help you out. Let’s get into it!

How to Force Start or Reboot Any iPhone
Are you having trouble with your iPhone? Is it frozen or unresponsive? Don’t worry, I’ve got you covered. I’m going to show you how to force restart or reboot your iPhone, no matter what model you have.
Here’s what you need to do:
- If you have an iPhone with a Home Button (like the iPhone SE, iPhone 6s, or earlier models), simply press and hold both the Home Button and the Power Button at the same time. Keep holding them until you see the Apple logo appear on the screen. Once you see the logo, you can release the buttons and your iPhone will restart.
- If you have an iPhone without a Home Button (like the iPhone X, iPhone XR, or newer models), press and quickly release the Volume Up Button, then press and quickly release the Volume Down Button. Finally, press and hold the Power Button until the Apple logo appears on the screen. Once you see the logo, you can let go of the Power Button and your iPhone will restart.
How to Update All Apps with Just One Click
Do you want to make sure all your iPhone apps are up to date? Don’t wait for the iOS to do it for you – take matters into your own hands and update all of your apps at once. It’s easy, and I’ll show you how.
Here’s what you need to do:
- Open the App Store on your iPhone.
- At the bottom right of the screen, tap on the ‘Updates’ tab.
- If there are updates available for your apps, you’ll see an ‘Update All’ button at the top right of the screen. Just tap on it, enter your Apple ID password if prompted, and let your iPhone do the rest. It will update all of your apps in one go.
That’s it! You now know how to force restart or reboot your iPhone, and how to update all of your apps with just one click. I hope these tips help you get the most out of your iPhone!

- To get started, open the Apps store.
- Next, click on your avatar in the top right corner to access your account.
- Once you’re on your Account page, simply slide down to refresh it.
- Finally, locate the “Upcoming Automatic Updates” section and click “Update all” to update all your apps at once.
Asking Siri for Passwords
Siri is more than just a virtual assistant for phone calls and information. It can also help you retrieve your passwords.
All you need to do is say, “Hey Siri, show me my passwords,” and Siri will open the Passwords & Accounts section in the Settings app. From there, it will verify your identity and reveal your saved passwords.
If you want to find out the password for a particular website, you can simply ask Siri. Just say something like, “Hey Siri, show me my Facebook password,” and Siri will guide you through the process of finding and revealing your password. It’s a quick and easy way to access the information you need.

Transform Your iPhone into a Handy Mac Camera
Guess what? Apple just came out with yet another super useful feature in the macOS Mojave and iOS 12 called the Continuity Camera.
Here’s the deal: with this cool feature, you can effortlessly snap pictures and scan documents using your iPhone and instantly transfer them to your Mac without any fuss—no cords, no extra apps.
Now, there are two awesome ways to take advantage of the Continuity Camera. You can either bring the images right onto your desktop or directly insert them into any document-based app on your Mac.

To get images on my Desktop, I can follow these steps:
1. First, I need to right-click on my Mac’s desktop.
2. From the options that appear, I should select “Import from phone.”
3. Now, I will see the name of my connected iOS device and two other options: “Take Photo” and “Scan Documents.”
4. If I want to take a new photo, I can click on “Take Photo.” Or if I want to scan a document, I should choose “Scan Documents.”
5. After taking the photo or scanning the document, I should tap on “Use Photo” on my iPhone.
6. Voila! The photo will automatically appear on my Mac’s desktop in no time.
If I want to add images to an app, here’s what I can do:
1. Firstly, I need to open any document-based app on my Mac, such as Pages, Notes, Keynote, TextEdit, Photoshop, or MS Word.
2. Once the app is open, I should bring the cursor to the spot where I want to insert the image.
3. Next, I should go to the app’s Edit menu and scroll down to find “Insert from iPhone.”
4. By selecting that option, I can easily add images from my iPhone to the app.
It’s great to know that I can effortlessly transfer photos and documents between my iPhone and Mac!
When using the Mac app, you may notice a small menu box appearing right where you’re typing. It contains the name of your connected iOS device and two other options: “Take Photo” and “Scan Documents”. You can click on “Take Photo” or “Scan Documents” to capture images using your iPhone.
After taking the photo or scanning the document on your iPhone, simply tap “Use Photo”. Instantly, the photo or image will appear in the Mac app where you placed your cursor.
Remember, for the Continuity Camera feature to work, your Mac and iOS device must be on the same iCloud account and placed close together.
Create your own custom ringtones for iPhone
While there are plenty of apps with pre-made ringtones for iPhone, you can also make your own personalized ringtone. Whether it’s a snippet of a song or your baby’s first words, you have complete control over the sound of your iPhone.
Hey there! Today, I’m going to show you the simplest way to make your very own personalized ringtone for your iPhone. Trust me, it’s super easy!

A Handy Shortcut to the Beginning of Your Photo Album
When you open the photo album on your iPhone, it always starts at the bottom, showing you the newest pictures first. If you want to go all the way back to the beginning where the oldest photos are, you have to scroll up. It can be a long and tiring process, especially if you have hundreds of pictures.
But guess what? There’s a clever trick that can save you time and effort, sparing your thumb from all that scrolling.
Just tap once at the very top of the screen, and magically, you’ll zoom straight to the beginning of your album! No more endless scrolling!
Find Your Missing AirPods with Siri
AirPods are amazing little gadgets, but their small size and wireless design make them easy to lose. It’s frustrating and expensive to misplace them. Luckily, there’s a way to locate your lost AirPods using your iPhone.
Hey, did you know that Siri can help you find your AirPods? It’s pretty cool! All you have to do is activate Siri and say, “Find My AirPods,” and Siri will do its magic. It’ll play a loud tone from your wireless earbuds to help you locate them. How handy is that?

Send Unknown Callers Straight to Voicemail
Tired of receiving spammy and mysterious calls? No worries – there’s a simple solution! By sending unknown numbers directly to your voicemail, you can wave goodbye to those annoying interruptions.
Before you activate this handy feature, remember to save all the important numbers in your address book. This way, you can ensure that you never miss a call from someone you know.
Wondering how to set it up? Just follow these easy steps:

- To optimize your iPhone’s battery life, go to the Settings app and select “Phone”.
- Scroll down until you find the option “Silence Unknown Callers” and turn it on.
Improve Battery Life with Charging Optimization
People often complain that their smartphones lose battery life quickly. I’m not sure about other brands, but Apple phones have a special feature that can help improve battery longevity.
This amazing feature is called “Optimized Battery Charging”. It’s designed to slow down the aging process of your iPhone’s battery by changing the way it charges.
Here’s how it works: “Your iPhone learns from your daily charging routine and waits to finish charging past 80% until you really need it.”
If you think this feature could be helpful, here’s how you can activate it:

- To optimize your iPhone’s battery health, go to Settings > Battery > Battery Health.
- Turn on “Optimized Battery Charging” and this feature will start working on your phone automatically.
Move several apps together
If you ever wanted to move multiple apps on your iPhone, you had to hold down and drag each one separately – not very efficient, right?
But with the new iOS update, Apple has finally addressed this inefficiency. Now you can move multiple icons all at once! Here’s how:

- Step 1: Hold down an icon until the jiggle mode appears, then select “Edit Home Screen”.
- Step 2: Gently move the icon so that the little “x” in the top-left corner disappears.
- Step 3: Tap on other app icons to include them in your selection and move the group to a new position.
Using Your iPhone as an Apple TV Remote
Have you ever hunted high and low for your TV remote, only to find it has mysteriously vanished? Well, fear not! If you have an Apple TV, you can use your iPhone as a backup remote.
There are two ways to launch your Apple TV Control using your iPhone:
1. Through the Control Center:
- Swipe down from the top right corner of your screen.
- Locate and tap on the Apple TV Control icon.
When it comes to operating your Apple TV, there are a couple of different ways you can control it. Here are two methods you can use:
1. Using the Remote App on iPhone
To get started, you’ll need to download the Apple TV Remote app on your iPhone. Once you have it installed, open the app and select the remote icon to launch it. This will give you the virtual remote control for your Apple TV right on your iPhone screen. Pretty convenient, right?
2. The Apple TV Remote App
Another option is to use the Apple TV Remote app itself. This app allows you to control your Apple TV using your iPhone. Simply download the app and open it on your iPhone. From there, you’ll have access to a virtual remote control that you can use to navigate and control your Apple TV.
Both of these methods offer a simple and convenient way to control your Apple TV from your iPhone. Give them a try and see which one you prefer!

Quickly erase the last number in the Calculator app
Have you ever been using the Calculator app on your iPhone and accidentally entered the wrong number? It can be frustrating when your long and complicated calculations get thrown off, and you have to start over by tapping the Clear [C] button to erase everything.
But guess what? There’s actually a way to delete just the last digit you entered without clearing everything. All you have to do is swipe your finger to the left or right of the numbers, and the last digit will disappear.
With each swipe, you’ll remove one digit at a time until the number becomes zero.

Use Your iPhone Camera to Scan QR Codes
Believe it or not, some folks still haven’t discovered this awesome feature: your iPhone’s camera can actually read and decode QR codes! Don’t worry if you’re one of them – I’ll show you how it works.
All you have to do is open up your camera app and point it at the QR code. Just like magic, the camera will scan it and turn it into a URL link. Then, your phone will ask if you want to open up the link in Safari. It’s that simple!

How to set a sleep timer for media on your iPhone
Did you know that your iPhone has a handy feature that lets you set a sleep timer for playing media? This nifty tool is perfect for those of us who like to fall asleep to music or use white noise as a sleep aid. With just a few simple steps, you can ensure that your iPhone stops playing media after a specified period of time, so you can rest peacefully without draining your phone’s battery overnight.
Ready to give it a try? Here’s how you can set a sleep timer on your iPhone:
- First, open the Clock app on your iPhone. You can find it on your home screen. Once the app is open, tap on the “Timer” option located at the bottom right corner.
- Next, choose the duration for your sleep timer by adjusting the hours and minutes. When you’re done, tap on the “When Timer Ends” option.
- Scroll down to the bottom of the list and select “Stop Playing.” This tells your iPhone to stop playing media when the timer goes off.
- Now, tap “Set” at the top right corner of your screen. Once you’ve done that, tap on the “Start” button to activate the sleep timer.
And voila! You’ve successfully set a sleep timer for your media on your iPhone. Now you can drift off to sleep soundly, knowing that your music or white noise will automatically stop playing after the designated time. No more waking up to a dead battery! Sweet dreams!

Keep Your Photos Private in the Photo Album
Sometimes when you lend your iPhone to someone, they just can’t resist the urge to snoop through your Photo Album. And let’s face it, there might be some embarrassing photos in there that you’d rather keep to yourself.
Luckily, there’s a way to prevent this unwanted invasion of privacy by hiding those “special” photos. Here’s how you can do it:
- First, open the Photos app and navigate to the album where the photos you want to hide are located.
- Next, tap on “Select” at the top right corner of the screen, and choose the photos you want to hide.
- Once you’ve selected the photos, tap on the share icon at the bottom left corner of the screen.
- A menu will appear, and at the bottom, you’ll find an option called “Hide.” Tap on it.
- Lastly, confirm your actions by tapping on “Hide Photo”.
Remember: When you hide your chosen photos, they will disappear from the rest of your library. However, don’t worry – you can still find them in the special Hidden album.
Utilize Your iPhone as a Handy Leveling Tool
Most iPhone users don’t realize how useful this little device can be for everyday tasks. If you find yourself without a level while trying to hang a picture on the wall, don’t worry! Your iPhone actually has a built-in virtual level that can help you out. Here’s how you can access it:
1. Open the Measure app on your iPhone.
2. Tap on the “Level” option located at the bottom right of the screen.
3. Place your phone flat against the surface you want to check for levelness.
If you tap on the screen, you’ll be able to see the difference between the two surfaces. The red border indicates the amount of variation between the two angles. Pretty cool, huh?

Turn Your iPhone Keyboard into a Trackpad
Did you know that your iPhone keyboard can do more than just type? It can actually turn into a handy trackpad, giving you better control over your cursor. It’s like having a magic touch!
Here’s how you can make it happen:

When you’re typing something, just press and hold the spacebar to turn the keyboard blank and activate the virtual trackpad. Move your finger around to navigate through the text and release it when the cursor is in the desired position. You can also tap and hold the cursor itself to move it.
If you apply more pressure on the virtual trackpad, you can select text starting from the current cursor location. Just release the pressure to end the selection.
Important: This feature is available on iPhone 6S or later models.
Remove App download size limit:
To avoid exceeding your carrier data limits, Apple has a safeguard in place that only allows you to download large files over WiFi.
But if you still want to download a big file using your mobile data, there’s a trick to bypass the limit.
Here’s how you can do it:

- First, head to Settings and select iTunes & App Store
- Next, tap on App Downloads
- Here, you’ll encounter a few options – one of them, including the data limit, will be already checked. You have two choices: Always Ask (you’ll be asked to confirm app downloads on cellular data) or Always Allow (this removes the data limitation completely)
Silencing Unknown Callers
Are you feeling overwhelmed by the number of spam calls or robocalls on your iPhone lately? Don’t worry, because the iPhone has a simple solution for silencing these calls.
All you need to do is:

- First, go to your phone’s Settings.
- Next, tap on the Phone option.
- Scroll down and find the Silence Unknown Callers setting.
- Toggle the switch to turn it on.
Remember, when you activate this option, all calls from unknown numbers will be silenced. So, it’s important to save any important phone numbers in your contacts before doing this.
Close all of your Safari tabs at once
If you’re in the habit of opening new tabs for every website you visit, instead of replacing them, then you might have a lot of Safari tabs still open.
Closing each tab is easy – just swipe right. But if you have around 30-50 tabs to close, it can be tiring and time-consuming.
Hey there! So, I have this cool trick to help you out when you have a bunch of tabs open in Safari and want to close them all at once. Pretty neat, right?
All you have to do is tap and hold on the open new tab icon in Safari. Then, you’ll see a little option that says “Close All X Tabs”. Just tap on that and confirm that you want to close all your tabs.
And voila! Just like magic, Safari will get rid of all those pesky tabs for you in one fell swoop. No more clutter, no more hassle. It’s like hitting the reset button.
So next time you find yourself drowning in a sea of tabs, just remember this little trick. It’ll save you time and sanity. Happy browsing!

Once you’ve finished with that, Safari will ask if you want to automatically close tabs every day, week, or month. It’s a good option if you want to avoid having too many tabs open for a long time.
Use Spotlight for quick math
If you need to do some calculations quickly without opening the Calculator app, I have a faster trick up my sleeve!
Did you know that the Spotlight search field can also be used as a speedy calculator? Yes, that’s right! Besides searching for apps and other information on your device and the web, you can use Spotlight to perform simple math calculations.

I’ll show you a simple way to access Spotlight:
- Swipe to the right on your Home Screen or swipe down from the middle to open up the Spotlight search.
- Type in your calculation, and the result will appear right below the search field.
But that’s not all – Spotlight can also help you with unit conversions, such as currencies, measurements, and other kinds of units.

Put an end to apps hounding you for feedback
Imagine this: you’re right in the middle of a crucial task on an app, focused and in the zone, when out of nowhere, a pesky pop-up appears, demanding that you rate the app or provide feedback.
Now, I understand that feedback and reviews play a crucial role for app developers. They rely on user input to improve their creations. But let’s be real: constantly being bombarded by these intrusive pop-ups can drive anyone up the wall.

Hey, I’ve got some great news! You can finally put an end to those annoying interruptions on your iPhone.
Here’s how you can do it:
- Head to Settings.
- Tap on iTunes & App Store.
- Toggle In-App Ratings & Reviews to the “Off” position.
Want to start a group FaceTime call?
While there are plenty of video calling apps out there, as an Apple user, why bother with a third-party tool? You’ve got FaceTime, Apple’s very own video calling app, right at your fingertips. You can easily make seamless video calls with other Apple users.

Did you know that FaceTime has a hidden feature that allows you to make group calls with more than 30 people? It’s true! Here’s how you can do it:
1. First, open the FaceTime app on your iPhone.
2. Look for the + button at the top right of your screen and tap on it.
3. Now, enter the name or number of the person you want to call first.
4. To add more people to the conversation, you can enter up to 30 additional names from your contact list.
5. Once you’ve added everyone, tap on either the Video or Audio option to start your FaceTime call.
Isn’t that cool? Now you can have a big group chat or catch up with all your friends at once using FaceTime!
Here’s another neat trick for your iPhone: you can make the LED light flash to get visual alerts for your notifications. This can be really helpful if you have trouble hearing or if you’re in a noisy environment. Here’s how to turn on this feature:
1. Go to your iPhone settings.
2. Look for the “Accessibility” section and tap on it.
3. Scroll down until you find “Audio/Visual” and tap on it.
4. Look for the option that says “LED Flash for Alerts” and toggle it on.
Now, whenever you receive a notification, your iPhone’s LED light will flash, giving you a visual cue. It’s a great way to stay in the loop even when you can’t hear your phone!
These are just a couple of cool features that you might not have known about on your iPhone. Give them a try and see how they can make your life a little easier. Enjoy exploring all the hidden treasures of your device!
To make adjustments to my iPhone settings, I follow these steps:
1. First, I go to the Settings app.
2. Inside Settings, I tap on General.
3. In the General settings, I scroll down a bit until I see Accessibility, and I tap on it.
4. Once I’m in the Accessibility settings, I look for the section called Audio/Visual and tap on it.
5. At the bottom of the Audio/Visual settings, I find an option called Enable LED Flash for Alerts. I make sure to toggle it ON.
Now, let’s talk about Face ID and how you can add multiple faces to unlock your iPhone.
If you have an iPhone 6 or a newer model, you might use Face ID to unlock your phone. Face ID adds an extra layer of security to your device, which is great. But it can also be a bit annoying if you always have to be the one to unlock your phone for someone else.
Luckily, Apple has thought about that. Just like you could register multiple fingerprints with Touch ID, you can now register multiple faces to unlock your iPhone. This means that your partner or anyone else you trust can unlock your phone with their own face.
Here’s what you need to do to add multiple faces to Face ID:
1. Open the Settings app on your iPhone.
2. In Settings, go to Face ID & Passcode.
3. You’ll be asked to enter your passcode to access the Face ID settings. Enter it to continue.
4. In the Face ID settings, look for the option called “Set Up an Alternate Appearance” and tap on it.
5. Now, follow the on-screen instructions to scan and register the face of the person you want to add to Face ID.
6. Once the scanning is complete, the new face will be added to your Face ID, and that person will be able to unlock your iPhone with their own face.
And that’s it! Now you know how to adjust your LED flash settings and add multiple faces to Face ID on your iPhone. Enjoy your customized iPhone experience!

- First, go to Settings > Face ID & Passcode.
- Next, enter your passcode.
- Then, select “Set Up an Alternate Appearance”.
- After that, scan the face of the person you want to add to Face ID and follow the instructions.
- Finally, tap “Done” at the bottom to complete the process.
How to Unlock iPhone Without Passcode
Passcodes are really helpful in keeping your iPhone and its information safe in case it falls into the wrong hands. Learn more
Using the One-Handed Keyboard
Even though iPhones are a good size for smartphones, it can still be a little tricky to type with just one hand, especially if you have small hands.
To make it easier, the iPhone has a feature that moves the keyboard to one side so you can use just one hand to type.

Hey there! I’m here to show you how to enable a cool feature on your device.
- To get started, hold down either the emoji or globe icon at the bottom left of your keyboard.
- Next, select the icon that represents whether you want your keyboard to be left- or right-handed.
- Your keyboard will shift slightly to the right or left, depending on your choice.
- If you want to switch back to the normal keyboard, simply tap the arrow in the empty space.
Scan documents using the Notes and File apps
Have you ever needed to quickly scan a document but didn’t have a scanner nearby? Well, if you have an iPhone, you’re in luck!
Apple has made it super convenient by including a document scanner right in the Notes app.
Here’s how you can access it:
- Open the Notes app on your iPhone.
- Create a new note or open an existing one.
- Look for the camera icon located above the keyboard in the center and tap on it.
When you need to scan documents on your iPhone, there are a couple of different methods you can use. Let me walk you through them.
Method 1: Using the Notes app
1. Open the Notes app on your iPhone.
2. Create a new note or open an existing one.
3. Tap the plus button (+) above the keyboard to reveal the toolbar.
4. From the options that appear, tap “Scan Documents”.
5. Use the shutter button or one of your iPhone’s volume buttons to capture a photo of your document.
6. If needed, you can adjust the corners of the document by tapping and dragging them.
7. Once you’re satisfied with the scan, tap “Save”.
Method 2: Using the Files app
1. Open the Files app on your iPhone.
2. Select the “Browse” tab at the bottom.
3. Tap on the three-dot icon in the top-right corner.
4. From the options that appear, tap “Scan Documents”.
5. Take a photo of your document using your iPhone’s camera.
6. After capturing the document, tap “Save”.
Now, let’s talk about managing your iPhone’s storage space. With all the photos, videos, music, and other data on your iPhone, it’s easy for the storage to fill up. If you see the “Storage Almost Full” message, one way to free up space is by removing unused apps.
Think about the apps you rarely use or no longer need. You can offload them to free up storage space. Here’s how:
1. Go to your iPhone’s Settings.
2. Tap “General” and then “iPhone Storage”.
3. Scroll through the list of apps to find the ones you want to offload.
4. Tap on an app, and you’ll see the option to “Offload App”.
5. Confirm your choice by tapping “Offload App” again.
Offloading an app will remove the app itself, but keep its data and documents. If you ever decide to use the app again, your data will still be there. By offloading unused apps, you can reclaim valuable storage space on your iPhone.
I’m excited to share some good news with you – Apple has come up with a clever solution to help you free up space on your device. They’ve introduced a new feature called “Offload Unused Apps” that automatically removes apps you don’t use anymore, while keeping their important documents and data intact.
So, how does this work? Let me show you how to offload apps and make some room on your device:
1. Start by going to your device’s Settings.
2. Scroll down and tap on “General”.
3. Look for “iPhone Storage” or “iPad Storage” and tap on it.
4. Here, you’ll see a list of all the apps on your device, sorted by the amount of storage each app is taking up.
5. Find the app you want to offload and tap on it.
6. On the next screen, you’ll see an option called “Offload App”. Tap on it.
7. A pop-up window will appear, asking if you want to offload the app. Tap “Offload App” to confirm.
8. The app will now be removed from your device, but don’t worry – its documents and data will still be saved.
9. If you ever need to use the app again, simply tap on its icon on your home screen. It will be reinstalled automatically, and you’ll be able to pick up where you left off.
By offloading unused apps, you can free up valuable storage space on your device without losing any important information. It’s a simple and convenient way to keep your device running smoothly and efficiently. Give it a try, and enjoy the extra space!

- First, go to Settings and tap on “iTunes & App Store”.
- Next, scroll down to the bottom and toggle on “Offload Unused Apps”.
With this setting enabled, any unused apps on your device will be grayed-out on your home screen. But don’t worry, you can easily reinstall them with just a simple tap.
Transferring Data From Your Old iPhone to iPhone 13
Guess what? Apple has released their latest phone, the iPhone 13! If you’re thinking of upgrading, you’ll probably want to transfer all your data from your old iPhone to the new one. But don’t fret, it’s easier than you might think.
Create Your Own Special Vibration Pattern
Did you know that you can create custom vibrations for specific contacts on your iPhone? It’s true! This way, even if your phone is on silent mode, you can still tell who’s calling you just by the vibration pattern.
Ready to give it a try? Here’s how:
- Open your iPhone’s Settings and tap on “Sounds & Haptics”.
- Next, select “Ringtone” and then “Vibration”.
- Now, tap on “Create New Vibration”.
- To create your custom vibration, simply tap and hold on the screen in the rhythm you desire.
To stop and save a custom vibration, follow these steps: First, tap on “Stop” located at the bottom right of the screen. Then, tap on “Save” at the top right. Make sure to give your vibration a name before saving it.
Now, let me guide you on how to assign this custom vibration to a specific contact:
1. Open the Contacts app and find the desired contact.
2. Tap on “Edit” at the top right corner of the screen.
3. Next, select “Vibration.”
4. Finally, choose the custom vibration you created earlier.
Isn’t it amazing how your iPhone can connect seamlessly with other Apple devices? This is one of the major perks of using iOS. You can easily pair your iPhone with devices like the MacBook, iPad, and Apple Watch.
If you want the convenience of answering calls or replying to text messages from any of these connected devices, follow these simple steps:
1. Go to “Settings” on your iPhone.
2. Tap on “Phone” or “Messages,” depending on which feature you want to enable for other devices.
That’s it! Now you can enjoy the benefits of receiving texts and calls on your other Apple devices.
Here’s what you need to do:
1. Allow calls on other devices (or Text Message Forwarding)
2. Activate the devices you want to use for making and receiving calls or messages.
Let me break it down for you. When you tap on “Allow calls on other devices” or “Text Message Forwarding”, you’re giving permission to connect your phone with other devices. This means you can make and receive calls or messages on those devices as well.
To activate this feature, simply toggle on the devices you want to use. For example, if you want to receive calls on your iPad, you just need to turn on the toggle next to it. And if you also want to send messages from your Mac, turn on the toggle for that device too.
That’s it! Now you can stay connected and never miss an important call or message, no matter which device you’re using.